Search results for query: *
- Users: Haaselhoff13
- Order by date
-

Engine Wiring
Thanks for sharing that pic. I have plenty of pics of the engine and wiring. I am trying to find WHERE these wires go in the engine so I can route them to the right place. Preferably a blueprint displaying what each wire is and the description of the location- Haaselhoff13
- Post #3
- Forum: AUTOMOTIVE
-
Engine Wiring
Hey Y'all. I am working on a Nissan R390 GT1 build from Tamiya. I am in the process of building the engine and want to do wiring and plumbing. I found some great pics of real R390 engines as well as other build examples. My issue is: How do I find out where these wires go and what each wire...- Haaselhoff13
- Thread
- Replies: 6
- Forum: AUTOMOTIVE
-
-
Mustang GT4 (Tamiya 24354) - first kit as a newbie
Hey there - for a first it you did great! Remember, this is supposed to be a fun learning experience so don't be so hard on yourself. In regards to your questions: 1 - Masking tape is great IF you do it with an airbrush. Masking help much if you a brush painting because theres too much paint...- Haaselhoff13
- Post #2
- Forum: AUTOMOTIVE
-
'64 Chevy Nova - Resto Mod / Moebius
youre better off following the typical workflow and add a drop of clear gloss over top of it to mimic glass over the gauges- Haaselhoff13
- Post #28
- Forum: AUTOMOTIVE
-
Detail "Add-On" Resources
Check out: - https://scaleriders.com/ - https://www.hiroboy.com/ - https://www.scaleproduction.de/ (one of my favorite) - https://www.spotmodel.com/ These sites cover almost all of the aftermarket transkits, 3D printed and resin wheels, seats, decals, accessories, etc. available on the web...- Haaselhoff13
- Post #4
- Forum: AUTOMOTIVE
-
Scratch built gunboat Philadelphia 1/18.
7,000 hours is 291.67 years lol- Haaselhoff13
- Post #21
- Forum: WATERCRAFT
-
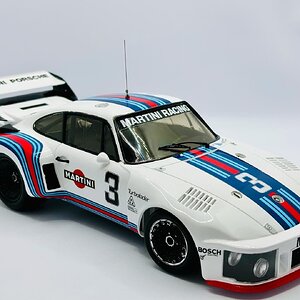
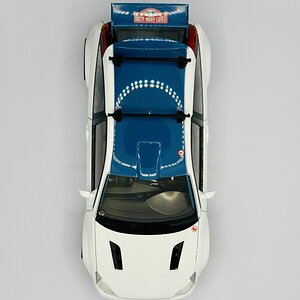
Lemme see those Porsches!
Looking for Porsche inspo. Just finished this 935 and working on a 911 Turbo RWB Transkit. Lets what what y'all got!- Haaselhoff13
- Thread
- Replies: 4
- Forum: AUTOMOTIVE
-
7F68AA64-50C3-4A7E-89BC-AE2E5F5716D7.JPG
- Haaselhoff13
- Media item
- Comments: 0
- Category: Automotive
-
Order of events in regards to painting car body
Hate to break it to ya but if you don't wet sand, you're never going to get a smooth glossy coat. Inevitably the way the gloss coat cures will reveal orange peel and slight imperfections. Hence, needing to wet sand a polish. I spent hours sanding the model I attached in this pic and it still...- Haaselhoff13
- Post #13
- Forum: AUTOMOTIVE
-
IMG_6205.jpg
- Haaselhoff13
- Media item
- Comments: 0
- Category: Automotive
-
How the Flock do you Flock?
Ive never tried embossing powder. might give it a go. thanks!- Haaselhoff13
- Post #7
- Forum: AUTOMOTIVE
-
Order of events in regards to painting car body
Based off the order of your steps, I think you are actually agreeing with me lol. My order: Prime Body color "decals gloss coat" whet sand trim and bare metal if you do trim BEFORE gloss then areas that are meant to be semi gloss or matte will show up at gloss- Haaselhoff13
- Post #8
- Forum: AUTOMOTIVE
-
How the Flock do you Flock?
Thanks for the help. I should have been more clear. I was referring to the interior flocking of vehicles to mimic carpet. However, these videos will help when building dioramas- Haaselhoff13
- Post #3
- Forum: AUTOMOTIVE
-
Order of events in regards to painting car body
You really only need to do one gloss coat. Just make sure it has 3-4 layers so when you whet sand it doesnt peel all the gloss coat off.- Haaselhoff13
- Post #5
- Forum: AUTOMOTIVE
-
How the Flock do you Flock?
Anyone have any good tips on flocking? Last time I tried it half the flocking fell off, then I made the mistake of pushing some in with my fingers and truly ruined it. Do I need to add more glue to the areas I'm flocking? Add more flock?- Haaselhoff13
- Thread
- Replies: 7
- Forum: AUTOMOTIVE
-
-
Audi RS7 - Alpha Model - Unboxing and Build
You got a YouTube subscriber out of this post :cool:- Haaselhoff13
- Post #2
- Forum: AUTOMOTIVE
-
Order of events in regards to painting car body
Add decals BEFORE clear coat After clear coat - paint trim and other bits that wont be gloss- Haaselhoff13
- Post #2
- Forum: AUTOMOTIVE