Search results for query: *
- Users: Modulwhatuluv
- Order by date
-
M
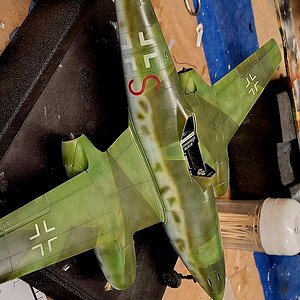
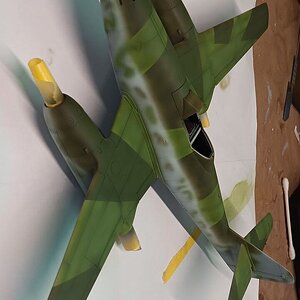
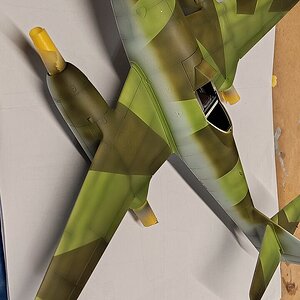
Tamiya Me-262 A1
Didnt have much luck with oils, im ok at best with them anyways, so i reglossed and just airbrushed fading, grime and tonal differences. Start on chipping tomorrow! Thanks to everybody for the kind words on the build, and always, constructive criticism is ALWAYS welcome!- Modulwhatuluv
- Post #32
- Forum: AIRCRAFT
-
1000015590.jpg
- Modulwhatuluv
- Media item
- Comments: 0
- Category: Aircraft
-
M
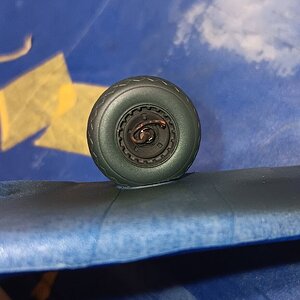
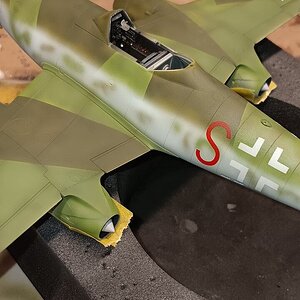
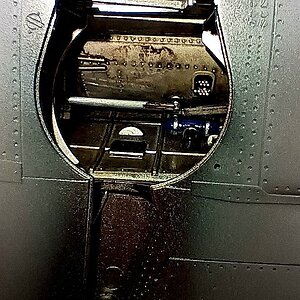
Tamiya Me-262 A1
Decided to add some break lines with lead wire and painted on most of the big decals, Tamiyas usually so thick.- Modulwhatuluv
- Post #28
- Forum: AIRCRAFT
-
20240504_210235.jpg
- Modulwhatuluv
- Media item
- Comments: 0
- Category: Aircraft
-
20240504_204101.jpg
- Modulwhatuluv
- Media item
- Comments: 0
- Category: Aircraft
-

20240504_204149.jpg
- Modulwhatuluv
- Media item
- Comments: 0
- Category: Aircraft
-
M
Tamiya Me-262 A1
- Modulwhatuluv
- Post #27
- Forum: AIRCRAFT
-
1000015548.jpg
- Modulwhatuluv
- Media item
- Comments: 0
- Category: Aircraft
-
1000015550.jpg
- Modulwhatuluv
- Media item
- Comments: 0
- Category: Aircraft
-
M
Tamiya Me-262 A1
Thanks...the wife was like "ooohhhh that's a pretty lime color" For the love of....lol- Modulwhatuluv
- Post #23
- Forum: AIRCRAFT
-
M
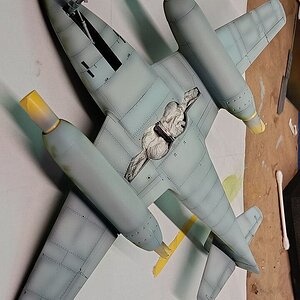
Tamiya Me-262 A1
First part of painting completed. Tomorrow blending and mottling, probably panel tonal changes Sunday. Rear area versus upper area lighting/shadowing is something I'm really starting to implement more.- Modulwhatuluv
- Post #21
- Forum: AIRCRAFT
-
1000015448.jpg
- Modulwhatuluv
- Media item
- Comments: 0
- Category: Aircraft
-
M
Tamiya Me-262 A1
Tried something I had read about, and I'll be dammed. Didn't think adding red to black would do anything, but it's noticeable for preshading!- Modulwhatuluv
- Post #18
- Forum: AIRCRAFT
-

1000015440.jpg
- Modulwhatuluv
- Media item
- Comments: 0
- Category: Aircraft
-
M
Tamiya 1/48 Me 262
You may say the photos suck, but the model looks really great!- Modulwhatuluv
- Post #15
- Forum: AIRCRAFT
-
M
Tamiya 1/48 Me 262
The conversion came out great! What color or mixture did you use for the underside? It's like the best example of a "pale" RLM 76. I've started a mixture but still hues too "blue"- Modulwhatuluv
- Post #8
- Forum: AIRCRAFT
-
M
Tamiya Me-262 A1
That was the last of my Alclad High Shine Aluminum...and it'll hardly be seen:(- Modulwhatuluv
- Post #16
- Forum: AIRCRAFT
-
20240428_134112.jpg
- Modulwhatuluv
- Media item
- Comments: 0
- Category: Aircraft