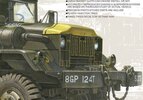
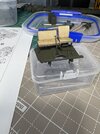
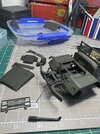
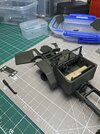
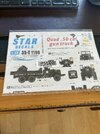
M54 truck

The tricky part may be to adjust the cab to the chassis
Put it on the chassis after you build it, but before the glue dries, make sure it sits correctly and then keep it on until it's dry. Every time you fit a major part to it, put it on the chassis again to make sure it still fits.
 
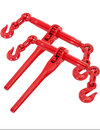
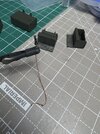
This is the jammie I was referring to in the earlier comment, I don't remember the name of it, chain ratchet tie down or something like that… ‍♂️♂️

IMG_6564.jpeg
 
As you can now see, G, this is not a small kit, HA! ;) I've built several of them, and I enjoyed the builds. I guess I never really paid much attention to the difficulty, just a ton of suspension parts. These are awesome trucks and I will always prefer an AFV over the other kits. Not sure exactly why, maybe I'm used to em. You are pluggin along very well, so Ruck On, G!
 
Put it on the chassis after you build it, but before the glue dries, make sure it sits correctly and then keep it on until it's dry. Every time you fit a major part to it, put it on the chassis again to make sure it still fits.
Yes thanks. That's the plan. Will see how it goes
 
As you can now see, G, this is not a small kit, HA! ;) I've built several of them, and I enjoyed the builds. I guess I never really paid much attention to the difficulty, just a ton of suspension parts. These are awesome trucks and I will always prefer an AFV over the other kits. Not sure exactly why, maybe I'm used to em. You are pluggin along very well, so Ruck On, G!
Agree... When I started this kit, I thought it would be a very simple one, however, it is getting interesting.
 
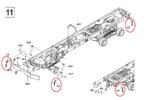
What are parts C1, C2 and C3 for? They look water jets?? Some other armored vehicles have those too.
On my model, the C2 are horizontal (looking backwards), so I assume they can be turn up or down.

Screenshot 2025-05-02 092145 2.jpg
 
Thanks Jakko.. Would have never thought about that. Shape looks weird if it is only a kind of valve and coupling for air system...
 
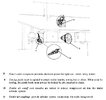
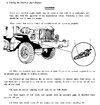
When I looked at the instructions you posted, I couldn't make heads or tails of what those bits were supposed to be either, so I thought I'd see if I could find a TM :) I'm still not sure this is what they are, but they do look like the bits in the screenshots.
 
Painting on going... and another question: why is the front of the hood painted in yellow ? Checked several pictures and some have it, some dont.. ?

Screenshot 2025-05-08 205104.jpg
 
If I'm not mistaken, that was a unit marking (or perhaps better: practice in some units).
 
and another question: how do you paint metallic chain? I mean, with the airbrush there will some areas not painted (covered in between links) but with brush, will be messy? This is supposed to be attached to the "wire" at the end of the winch...


IMG_9826.jpg
 
Haven't tried the burnishing fluid on chains yet... that could be one approach; that would 'blacken' it, to which you then apply weathering, or areas of vehicle colour, the shiny bits having been removed with the blackening (sort of a reverse weathering)

I don't have an airbrush; my current method is 'messy': to pull it through a shallow container of thinned paint, or load a broad brush with paint, and pull the chain through the bristles lightly wiggling, pressed a on a flat surface; might have do to it a few times to get all the surfaces painted.
The trick is to not have the paint so thick that it fills in the links.

Starting directly with AK 'track' weathering works for some situations.

I let the chain hang to dry. If it is going to hang in the model like a truck gate chain, I fold it before it dries as close to the shape as I can to avoid cracking the dried paint.

And for chains laying flat on a surface, you could glue it in place and paint it afterwards if it is the same base colour as the vehicle. A bit of wash, weathering, or highlights will accentuate the links.

For heavy weathering, I add pigment powder to the paint and daub with a hack brush.

Super tiny chains I glue, then paint in place with a fine brush.

A 'loose', heavy chain painted and weathered before placement:
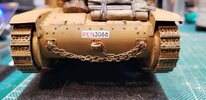
20241111_210634.jpg


Write your reply...

Latest posts

Back
Top