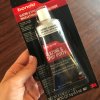
I think i've found ideal putty for my models

CY343491

Active Member
Joined
Apr 5, 2023
Messages
387
Hi,
When i started modelling i was using mr. dissolved putty, it doesn't fill large gaps and cures so slow, takes so much time when assembling, then i tried "mr. white putty R", it's not bad, but needs thinning all times and cures so quickly and a little bit expensive. I've found an alternative way, ordered an acrylic based wall filler in 200 ml tube tried on plastic model, worked great, it has ideal consistency, no need for thinning, ideal curing time, easy application, can be sanded easily, applicated brush can be cleaned with soapy water because it's acrylic based.
 
Modeling magazines here in Japan like Hobby Japan and Model Art have done articles on all of the various putties and their uses, with their pros and cons. I have translated much of these and I really should spend the time to present this information to more people.

Acrylic putty is great to use with painted surfaces because it is not lacquer-based, it does not attack the paint. I had painted the parts of my FineMolds Millennium Falcon before assembly. After I put the parts together, I found a gap that was creating a lot of light leak. I filled the gap with Vallejo acrylic putty, wiped away excess with water, and re-painted that area real quick. The gap was gone and so was the light leak.

Putty depends on the situation for what you need. Let's say you have air intakes on a jet fighter. The outside looks nice, but the inside has the injector point indentations. Use Tamiya's light-curing putty for that. Fill in the injector holes, shine a light on it, then sand it down until it's smooth. Now the interior of the intakes look nice and smooth. Last week I used polyester putty to plug up a hole and create a pin that had broken off, replacing the pin with some brass rod. The poly putty works great for pinning garage kits, but I just recently learned that it is difficult to find outside of Japan because it's flammable.
 
After numerous goes at everything.

Mr Surfacer. Comes three thicknesses 500 thickish 1000 & 1200.

500 fills most. But if too large a gap I slip a bit of plastic in with cement.

99% of filling is before priming. Does not flake away & sands well as it is about the same
hardness as the plastic.

It can be sanded down to nothing on the edge & will not dislodge.

Laurie
 
Last edited:
For seams, I used Squadron white for years-the old formula, not the revised formula. I used acetone to thin it or to remove excess. I had 2 methods. One was to apply the putty to the seam and then use a Q-tip dunked in acetone to wipe away the excess. The other was to mix a little blob of putty with a couple drops of the solvent on my ceramic palette, till I had a good consistency, then to brush it on the seam with an old paintbrush. Again, I wiped away the excess with a bit of acetone. I called this my homemade Mr. Surfacer.

When that old tube finally wore out, I switched to Tamiya's surface putty. The properties seem to be much the same as Squadron's old putty had.

But I use other methods to deal with seams, and with gaps, too. The first is to plan ahead and try to reduce or eliminate seams altogether with the squeeze or extrusion technique. I use liquid cement and flow a little along the seam. Then I apply pressure to squeeze out a bead of melted styrene along the seam. When this cures, it's simply a matter of scraping that bead away, leaving virtually no visible seam.

Another method is to use stretched kit sprue to fill a seam and to flow liquid styrene cement over it. Almost as good as the extrusion technique, in my opinion. I like the idea that the seam is filled with the same material as the surrounding plastic.

If it's a gap, then I will lay pieces of stretched sprue or styrene strips in it, and flow styrene cement over that.

On resin or white metal kits, like figures, then I'll use Mr. Surfacer, for fine seams or scratches; the Tamiya putty, for slightly deeper or more visible seams; and 2-part epoxy putty for gaps. I use Aves ("ay-veez") for this.

I like Mr. Surfacer for filling pinholes or fine seams and scratches, but it does have a tendency to shrink in some applications. It's a good primer, too.

Not had Mr Surfacer shrink ever quite the opposite it holds its place very firmly.
That is the beauty of the the 3 fillers.

There are 3 different thicknesses you have to use the correct one for the job.

Typical the top of the fuselage two halves. Sand the top fill & stretch the 500 down the sides a little.
When dry sand & you will not fined the edge of the 500 filler or trace of the joint.

Got one soon I will show the merits of this filler.

Most fillers are to soft or too hard. 500 is so much the same as the plastic.

Laurie


But which Mr Surfacer where you using for which job.
 
The problem with Bondo Spot Putty is it has a very short working window. Once you mix in the hardener you only have 5-10 minutes before it gets too hard to work with. And it has a VERY strong odor. It is not wife-approved in my house. haha

I use Tamiya and Mr Hobby lacquer putties for most applications. The trick I like to do is I spackle the putty on and roughly form it to shape. Then I take some Mr Surfacer 1000 in a jar and brush it onto the fresh putty. This softens the putty and allows me to smooth it and shape it with the brush. Once I have softened and shaped the putty as needed, I let it sit overnight and it is good to go the next day.

The downside with lacquer putty is it shrinks. I often have to apply it 2 or 3 times to get an uneven seam filled the way I want it.

I have been searching for a good filler that has a working time of 30 minutes or more so I can take my time. A filler that doesn't shrink. And a filler that can hold its shape so you can use it to create features that weren't there and you can sand it without it crumbling away.

The closest thing I have come to this is I take a very thick, very slow CA glue and mix micro balloons into it. Micro balloons can be bought in large quantities from adhesive supply places. Or you can buy small containers from the hobby shop. It is used as a filler for RC boats and airplane construction.

This CA / micro baloon combo seems to work pretty well. The only drawback is that this filler is often harder than the material around it. So sometimes it can be hard to feather it out into the surrounding plastic.
 
Aves Apoxie Sculpt
Apoxie Sculpt comes close to what I want. The problem with that stuff is it is nearly impossible to mix it without getting little chunks in it where little bits cure too fast. And it doesn't cure hard enough to scribe panel lines into it.

This is what I have experienced in my limited use of it.
 
I definitely disagree 100%
It hardens like steel and I've been using vast amounts of it for well over a decade an never had difficulty mixing it .
Where did you buy it ?
 
Did you use a scale to mix it by weight ?

The B part will get dried out after a while if consumption is slow , but I never had issues getting a smooth , homogeneous mix even then . Just took extra kneading .

I will say that the Tamiya lacquer putty is by far my favorite in that category .
I have a pallet of it on standby , ;)
 
I mixed Apoxie Sculpt by balling up part A and B next to each other and eyeballing it. haha

Tamiya lacquer putty is my main go to. But I really dislike that I have to apply it multiple times because of shrinkage.
 
Yeah , the lacquer putties are mostly solvent .
That Tamiya is a true nitrocellulose .

With the Aves ,
I found when I eyeballed the balls , Har , I was waay off .
I switched to weighing each portion .
An unequal mix would cause a softer cure -- I don't know about the " chunks " . I think you just didn't knead it enough .
I roll it into snakes and keep folding it back onto itself repeatedly , repeatedly . and then some more .

If you don't want it you can send it to me . lol
 
I use Aves ("ay-veez"), too, for sculpting, and I'll second Momo. I have never had any issues with chunks or grit in the putty, that weren't resolved by just kneading some more. I knead till it feels smooth throughout.
My batch is perhaps 20 years old, too, and the gray part has some amber-colored resin leaching out. But that goes away with kneading. Unlike Milliput, which gradually cured from the outside in, and the cured bits had to be carved away and tossed.
I eyeball the amounts, and I make little snakes of each part, too. That lets me estimate a little better than making balls and starting from there. I wrap them around each other and start kneading from there. Whatever putty is left over after the job, I use to make little loaves of bread, or other bits of food, for my 54mm figures. No waste.
I've also found no issue scribing the putty, once cured. It's rock-hard and takes scribing and sanding well.
 

Latest posts

Back
Top